- 'Improve YouTube!' (Video & YouTube Tools) – Extra YouTube player option and default settings
- AdBlock — best ad blocker – Block adds
- Advanced REST client – Play with REST webservices
- Postman – Play with REST webservices
- Allow Select And Copy – Some pages try to block select and copy functionality
- Don't Fuck With Paste – Som pages try to block copy / paste functionality
- Auto Refresh Page – Sometimes you want a page to refresh on regular base
- DownAlbum – Assist to download foto albums shared via web
- Image Downloader - Assist to download foto albums shared via web
- Export links of all extensions – Create overview of all Chrome Extensions installed
- GoFullPage - Full Page Screen Capture – Capture full web pages (incl scrolling down) as image or PDF
- Google Docs Offline – Support for offline Google Docs functionalities
- Honey – Search for coupon codes when shopping online
- IE Tab – Some sites still need Internet Explorer
- Local Explorer - File Manager on web browser – Allow to open Windows Explorer from website url
- OneNote Web Clipper – Clip website into OneNote
- Recently Closed Tabs – See list of recently closed tabs
- RoboForm Password Manager – Password manager integration
- Selection Highlighter – Highlight the text select in the full website
- SingleFile – Download webpage as single mhtml file
- TweetDeck by Twitter – Twitter with options and multi accounts
- User-Agent Switcher for Chrome – Easily switch user agent
- Video Downloader professional – download video’s
- Web Scraper - Free Web Scraping – download / scrap content of full site or convert site to table
- Multi-File Downloader – download video’s and images from site
- Screencastify - Screen Video Recorder – record screen
- Web Developer – options for debugging during web development
Showing posts with label software. Show all posts
Showing posts with label software. Show all posts
Friday, May 28, 2021
my “Chrome extensions” selection


Wednesday, May 12, 2021
Home Assistant – DIY home IoT and automations domotica
Moving away from IFTTT
I used to orchestrate my home IoT devices such as cheap Tuya or Ewelink Sonoff wifi relays using the cloud IFTTT (If This Than That) platform as it made it easy to setup some flows without having any local infrastructure. Yet, quickly the flows became a bit more complex to add smart integration with other platforms such as Tado and Ezviz Wifi doorbell. Initially I still was able to achieve most of the orchestration and rules by integrating other cloud platform such as apilio.io and later on switchur. But as the IFTTT suddenly decided to charge extra high monthly costs (besides the high rates they charge to the manufacturers supporting IFTTT), and my use cases and needs became too complex to manage well with IFTTT, I decided to look at some alternatives. Too bad IFTTT didn’t had a bit more respect for their community and early adopters, but after all, I’m very glad to made the move, as much more fine grained control is now possible.
First I tried to play around with OpenHAB as a free home IoT platform, as it can easily run within a normal Windows environment (Java based) and has easy support for remote iOS/Android application. But soon I concluded I should switch to Home Assistant as it has a massive community support and a great look and feel with many devices and platform supported, including my favorites such as the Google Nest Hub and Google ChromeCast.
Setup Home Assistant
In order to run Home Assistant, one should check out the excellent installation documentation they provide. I chose to use a docker container in order to first test within a Windows environment but next run the same on an old small media pc on which I installed Ubuntu. Running perfectly on limited CPU, 2GB Ram and an 250GB SSD.
Home Assistant Docker
To just run home assistant docker in Windows, make sure to have installed WSL. In order to store your Home Assistant configuration outside of the docker container, a volume (folder) should be mapped from your OS towards the docker container. These files will be fully accessible from the Docker container, but will not be touched when upgrading or removing your docker container, to make sure your personal stored files are not lost. This mapping is possible with –v option:
initial install:
docker run --init -d --name="home-assistant" -e "TZ=Europe/Brussels" -w /config -v "<path>\ha-config\:/config" -p 8123:8123 homeassistant/home-assistant:stable
run docker:
docker run -d --name="home-assistant" -e "TZ=Europe/Brussels" -w /config -v "<path>\ha-config\:/config" --net=host --restart=unless-stopped homeassistant/home-assistant:stable
update docker:
docker update home-assistant
This will start your personal home assistant and make it accessible on port 8123.
Yet, after a while other option may be desired and other docker containers of other applications may be used (eg plex, youtube-dl, deepstack, etc). If you don’t want to type the full command with all option at each run, you can use docker compose to store your configuration option and allow to easily start, stop, upgrade etc. A docker-compose.yml file will just store your options for you to ease the commands to run.
A basic docker-compose.yml file used in Linux Ubuntu example shown below:
version: '3'
services:
homeassistant:
container_name: home-assistant
image: homeassistant/home-assistant:stable
volumes:
- /home/myt/homeassistant/:/config
- /home/myt/homeassistant/media/:/media
environment:
- TZ=Europe/Brussels
restart: unless-stopped
network_mode: host
With such as docker-compose file, below commands can be used. The container name homeassistant at the end of these commands is optional, it can be used if multiple dockers are defined in your compose file:
start with docker compose :
docker-compose up –d homeassistant
restart with docker compose:
docker-compose restart –d homeassistant
update with docker compose:
docker-compose pull
docker-compose up -d --build homeassistant
Advanced tips for running commands on the host without ssh
Remote access
The main development of the free and open source project Home Assistant is supported by the Dutch company Nabu Casa. They get their money to continue the development of Home Assistant by adding full remote cloud support to your local Home Assistant environment. This allows easy integration with Amazon and Google cloud services (assistant, text to speech, Nest Hub) and remote access to control your home with the Home Assistant app. These services require access to your local free Home Assistant deployment. Yet, these paid cloud services (5$/month) are not mandatory and all these cloud services can also be achieved when manually setup. It will just require some extra manual effort. Anyone who may not be familiar with Linux configuration and less IT minded will definitely be advise to use this paid subscription. Yet below approach is an alternative.
Different options exist to get remote access to your local server. As most will receive a dynamic IP address from their ISP that will regularly change, some forwarding is required in order to always know the public IP address of your local server. A dynamic DNS forwarder may be supported by your router or a little application can be installed on your server to update the public address of a DNS. Yet, even when the dynamic public IP address is know, this will require you to open a port on your router and allow inbound traffic from the internet towards your local server. Another solution that could be used is by running telebit.io or dataplicity (similar to ngrok but will keep for free your unique fixed dns whichs is only possible in the paid version of ngrok). With this little telebit service you can easily install and get a fixed telebit.io DNS linked to a specific port, such as port 8123 of your local Home Assistant by running below and confirming your email address:
> curl https://get.telebit.io/ | bash
> ~/telebit http 8123
Over time, I notice local network interruptions may interrupt the telebit forwarding. As a result, I configured a little cronjob that will check every 5 minutes if the external telebit url is still accessible. If not, it will deactivate and activate telebit again.
> crontab –e
*/5 * * * * /home/myt/check_telebit.sh
check_telebit.sh:
#!/bin/bash
URL=https://***.telebit.io
EXPECTED_STATUS=200status=$(curl -s -o /dev/null -w '%{http_code}' $URL)
if [ $status -ne $EXPECTED_STATUS ]; then
echo "HTTP status code is not $EXPECTED_STATUS. Disabling and re-enabling Telebit."
# disable Telebit
/home/myt/telebit disable
# enable Telebit
/home/myt/telebit enable
else
echo "HTTP status code is $EXPECTED_STATUS"
fi
Whatever solution is chosen, once a public accessible URL is available towards your local Home Assistant, it can be used within the Home Assistant iOS and Android apps and within the configuration of Amazon or Google Cloud services.
It might be required to also define the external public url within your HA configuration.yaml file:
homeassistant:
external_url: !secret external_url
As soon as any remote public online access is enabled, I would strongly advice to make sure the server is regularly patched with security updates as well as enabling 2FA within Home Assistant, as you should with any other cloud service.
Integration of services and devices
Once Home Assistant is up and running, it allows you to easily connect many different devices and cloud services. These can be setup using the Home Assistant Configuration Dashboard (localip:8123/config/dashboard) –> Integrations. Yet, also many services will require to be defined within the ‘configuration.yaml’ file stored within the config folder of your Home Assistant. All information required to correctly define these in your local config can be found on the excellent documentation pages of Home Assistant.
Services
Below a list of the services I found most useful:
- Google Calendar: whenever I need some activity to be scheduled on time, I do prefer to create a specific Google Calendar for it instead of hard coding it in scripts or automations. This makes it possible to get a clear overview of your schedules (using different colors for each calendar) and will also make it possible to easily add repetitions or exceptions (eg during holidays) by just planning it within your calendar as if you’d plan a regular meeting. Once the calendar is defined, an automation can be created that will trigger whenever a meeting starts and/or stops.
- Good to know: within a trigger by state change, you can define a ‘From’, ‘To’ state and ‘For’ how long that state should be active before the action is triggered. Eg the calendar will change to state ‘on’ when a meeting becomes active. The status can always be checked easily using the ‘Developer Tools’ page. Yet, if both ‘For’ and ‘To’ are left empty, the automation can be triggered by any change. I found this very useful as I initially tended to copy the automation in order to get a trigger for all states expected, while a common trigger was easier.
- Alarm: an Alarm control panel can be defined which allows you to arm, disarm and many other options. To set this up, I followed much of the approach as explained here by Thomas. Based on groups of sensors and groups of users, I automatically arm and disarm my custom alarm. When leaving (armed_away) or when at home (armed_home) sensors will trigger the alarm which will start recording on the camera’s, send notification and flash lights. Yet, in contradiction with the approach of Thomas, I don’t use a group to initiate the triggers. Since, once the group has state ‘open’ it will no longer detect other doors or windows being opened. So if for example you would have a window open before leaving, the group state will be open before the alarm is armed. Next, if another window in the same group would open, the group state will remain open and thus not trigger the alarm. Using Google Nest mini, Hub and ChromeCast integration I can also start a sirene youtube video at full volume and flash blue led lights. Different advanced options exist in order to get advanced notifications with specific option and sounds. An example below of an alert notification in case of alarm triggered, this requires ios actionable notifications push category ‘camera’ to be defined in order to allow immediate action on the notification to disarm. The camera category has special treatment in order to allow to open a life stream of the camera when long-pressing the notification on the iPhone. Using the url option, a specific lovelace site in the Home Assistant can be opened whenever the notification is clicked. The update.caf default iOS sound made some sound that would take my attention when needed.
- Telegram notification call: Still in order to make sure I would be aware of alarm events (eg at night of while away) I preferred to get called to make sure I would wake up. By integrating the CallMeBot api linked to telegram, this can be achieved. The bot will make a call and with text to speech read the pre-defined message eg indicating which sensor was triggered.
- HACS: HACS is THE un-official Home Assistant Community Store. It supports many custom integrations of services and extra front-end customizations. Once HACS is installed, it will be very easy to find, install and update any other custom integration.
- service: notify.mobile_app_iphone
data:
url: /lovelace-alarm/alarm
title: Alarm
message: Alarm at home {{now().strftime("%H:%M:%S %d/%m/%Y")}}
data:
entity_id: camera.ip_cam_stream
attachment:
content-type: jpeg
apns_headers:
apns-collapse-id: alert
push:
sound:
name: Update.caf
critical: true
category: camera
thread-id: alarm
Devices and integrations
As I used to only use cloud based services with IFTTT, most of my devices can still be controlled via the different cloud manufacturers, eg Ewelink and Tuya. These have a huge set of cheap wifi devices connecting through their platform. Using a local Home Assistant, you could opt to disable most of these cloud accesses if you don’t trust the cheap China based firmwares. Yet, for me I do prefer to have a fallback to control my devices using Home Assistant and the specific device apps. If my Home Assistant would not be accessible remotely, I may still be able to control the devices directly.
- Sonoff Ewelink wifi relays (+- €6 per relay): the relay just allows to turn on or off the current on a wire. Whatever is connected to it will thus get power on or off by it. I use it to control lights, water heating, cameras that doesn’t support full integration, garage ports, etc. Integration of Ewelink Sonoff devices is now well supported in combination with the standard Sonoff cloud firmware.
- Sonoff Ewelink wifi power plug switch (+- €6 per switch): Same behavior as the wifi relay, but made for power cord connection
- Sonoff Ewelink wifi door sensors (DW2) (+- €6 per sensor): these very small battery based sensors will just detect if the sensor is open or closed. Based on this the alarm can trigger if desired, etc.
- tado central heating (base kit +- €200, +- €60 per extra optional radiator valve): this allows multi room valves to control temperature in each room separately and get constant sensor information on temperature and humidity of each room. Over time, I extended this to multiple rooms as it showed to give a high comfort: when needed separate room temperature can be increased while also allowing to limit the heating to minimum when not needed. So over time, this may result in some heating cost saving.
- Ezviz wifi doorbell DB1 with camera (+- €100): doorbell that will call you on your phone when someone rings the bell, it includes sensor for detecting motion (before button is pressed) and camera to see life feed. It support local SD card recording and recording using Home Assistant, by doing so, no cloud recording subscription is needed (while possible). Motion detection integration within HA is possible, yet so far the bell button press event can’t be captured within Home Assistant yet.
- Tuya wifi power plugs (+- €6): I connect an AirWick power plug-in to this smart plug, so I can plan when the AirWick fragrance should be release (it’s too overwhelming when leaving powered on all the time). So based on a specific Google Calendar I repeat the AirWick to turn on and off at regular intervals. Using local tuya HACS or standard tuya integration, full integration within HA is working well.
- Many of these Tuya smart power plugs also offer power monitor functionality. This can easily be integrated into the power moniotorring of Home Assistant. If the device only provided current, it can be converted into kWh using the Utility Meter integration.
- Cheap IP camera’s (+- €15 per camera): some don’t allow full integration, but by connecting these to a wifi relay, still they can be turned on and off. Some cheap ip camera’s do support rtsp video streaming, which can be integrated into HA generic camera integration. In order to find the correct rtsp url to use, eg with ffmpeg, one can use the onvif device manager tool which will scan your local network and discover many cameras including the rtsp url, or using this site detecting your IP cam device type and url. Doing so, I discovered I was still able to integrate some cameras I didn’t expect they would work. Example configuration.yaml:
camera:
- platform: ffmpeg
name: Living webcam YCC365
# PTZ support for YCC365 compatible cameras: https://github.com/fjramirez1987/PTZ-YCC365
input: !secret YCC365_rtsp_url
- I also bought a cheap Tuya based wifi IP camera (+- €15).
Because it was based on Tuya, I expected to be able to get a better integration in Home Assistant platform. Yet, it seems these cameras don’t allow any RTSP life streaming feed of the camera image, nor ONVIF protocol. Even the motion detection notifications can’t be integrated, except within the Tuya application itself. So I’m still looking for a good wifi ip camera with optimal Home Assistant integration to be able to trigger any Home Assistant event as soon as a motion is detected. As a temporary workaround I now trigger a Tuya wifi plug state when a motion is detected. With Home Assistant local tuya HACS integration, this plug state switch can immediately be detected and next this can trigger any other event within Home Assistant. This allows alarm trigger on camera motion detection, but is not optimal off course. Since the AirWick sense is only connected to this Tuya wifi smart plug, briefly turning it on and off again at some motion detection has not much further impact.Since 10/2021 the Tuya integration within HA has been renewed and now much better support is available, including camera support! - When you’d have multiple camera’s to show in a web lovelace, it might be interesting to look at the WebRTC plugin which makes it possible to have faster rtsp streaming.
- Tuya water irrigation wifi control (+- €35): open or close a water to allow remote garden irrigation
- Tuya wifi roller blind motor (+- €40): remote control roller blinds and by integrating within Home Assistant they can become smart and eg take into account sun state or anything else
- Tuya wifi IR controller (+- €15): allows to control all infra red devices via wifi. this allows to ‘integrate’ many old ‘dump’ devices, althout the integration is not always optimal since you can’t get any feedback or status info of the device.
- Tuya wifi smoke detector (+- €15): get notified when smoke is detected at home and sound a loud alarm
- Audi connected car integration: see mileage, state of car doors, windows and locks
- Google ChromeCast, Audio ChromeCast and Google Nest Hub (€35 - €100): ChromeCast devices allow great interaction and Home Assistant has good support for these.
- Tuya ZigBee gateway & ZigBee door sensor and scene button:
- These ZigBee devices didn't seem supported by default in Home Assistant. In order to still be able to read the states of such unsupported device, it might be a solution to add a 'Vritual Tuya Device' (when adding a virtual device, best to add it into the 'Tuya App Account' instead of into an Asset, to make sure it becomes visible in Home Assistant)
- Using the Tuya app build in scene's, the virtual devices (eg switch) can be set whenever the states of the Home Assistant unsupported device state would change. This will allow to still see the actual state of such unsupported device in Home Assistant and interact with it.
Personal tips for automations and scripts
Scripts to return to automatic default state
While defining different automations and scripts, you will notice this will probably be a incremental approach. Specific occupations will occur, which you’ll notice you may want to cover over time, extending your automations and scripts to cover more exceptional cases or combinations etc.
Personally, I tried to use the automations to trigger and initiated special activities, yet, within the ‘Action’ part of the automation, I would try to use as most as possible a call to a script. This allows you to re-use many actions as the same script can be called at other triggered events. This will make sure you won’t have to redefine the same actions over and over again for each automation.
For many group of devices I also tried to follow the same setup as used by tado: define a default standard schedule and allow to overrule it manually whenever desired. As soon as the manual overruling is no longer needs, return to the default automatic schedule.
- I most often define a default automatic schedule using a specific Google Calendar: eg when outside lights need to turn on and off, when camera’s need to turn on and off, when water heating needs to trigger, etc.
- Within the Home Assistant web and app interface, all buttons are available to overrule this automatic default schedule
- I created for all these groups of devices a script to return to automatic state whenever launched. This ‘automatic’ or ‘default’ script became very important. Whenever a specific intervention is ended, I would not call to turn on or off a specific device, but always call this ‘auto’ script in order to make sure the device can return to the state it should be as defined by the default schedule.
For example: I created a default schedule to light up some outside lights in the evening based on a specific Google Calendar. But I don’t want to keep these light on all night, only in the evening and morning. Yet, I return home in the middle of the night, I still want these outside lights to light up for a short time. So the lights follow the schedule in the calendar and whenever I return while the sun is down, I make sure the lights will light up. But after a while, the light will not be turned off but the ‘auto’ script will be triggered to make sure they return to their default schedule. So the 'auto' script will detect if the lights should go on or off depending on sun state and calendar planning. I applied the same approach for cameras, heating, water heating, alarm etc. These ‘auto’ scripts tent to become complex with different conditions to cover all cases, but once defined, any automation can easily call such ‘auto’ script at any time without worrying about all special cases and combinations. This has proven to be very valuable.
Parallel processing
While writing different scripts and automations in Home Assistant, one should remember when an automation or script sequence is launched, all commands will be executed in the specific sequence one after another. If multiple actions would need to be executed in parallel, different automations can be created that get triggered. Eg by creating a variable (‘Configuration > Helpers’). As soon as the state of this variable changes, all automations depending on this helper variable state will be triggered and execution will be started in parallel. For an alarm activation this may be needed to make sure the different actions get triggered asap, such as recording, lights, notifications etc.
Icons Material Design
It is possible to assign custom icons to devices, buttons, scripts etc within Home Assistant. The easiest way to achieve this is by using Material Design icons, which are natively supported, eg using ‘mdi:account’ to get a kind of account/user type of icon.
As many icons are supported by Material Design, I mostly use this materialdesignicons.com website with good search capabilities in order to easily search through the long list of icons and try to find some icons that matches best my needs. Since late 2021 extra support has for Material iconas has been added withing HA which allows very easy Material Design icon selection within HA itself.
Most valuable uses cases to automate
- Full autonomous alarm system: turning on and off based on location of the family members, see details above. It will turn on and off the in house cameras making sure the camera’s are only capturing when needed so to limit capturing private privacy in house activity.
- Warn if the garage gate is open, with smart notifications to easily close the garage gate or trigger the alarm. As long as the garage gate remains open, the warning notification will triggered regularly (every 30min) to keep on warning the gate remains open.
- Whenever the garage gate is open, start the garage camera to record any motion detected
- Warn when leaving the house while some doors or windows are still open, indicating in the notification which door or window is not closed.
- Warn when windows are open for a too long time, while it’s cold outside.
- Warn when the battery of door and window sensors are getting low
- Control the lights outside the house, to turn on and off based on sunset and sunrise or alarms
- Flash the front door lights several times when arriving home and frost is expected the next day so to warn the car windshield should be protected against frost.
- Turn off the lights in the middle of the night till morning, but when arriving home in this period, still turn on the front door lights for a short period while entering the house.
- Turn on hall light at night or when cloudy weather
- If motion is detected at the front door, cast a life feed to Google Nest Hub to see what’s happening
- These use cases quickly became a bit more complex as exceptions where desired to only start the casting when someone is home and no casting on the hub was active. If some music casting was active, it would continue the music after a short interruption to show the front door camera stream.
- Start camera recording when alarm is triggered
- store pictures of last alarms triggered by Ezviz DB1 doorbell
- Warn if my car is unlocked for a long period or when it’s unlocked while no one of the family is close to the car.
- When taking a bath in the bathroom, make sure the temperature of the bathroom is high enough and hot water heating is enabled.
- Disable the bathroom ventilation system at night (as it makes too much noise).
- Detect and notify high humidity (mostly in bathroom). If high humidity is detected, allow to easily turn on heating and enable bathroom ventilation system.
- If a room heating is on yet some window is open in the same room, send a warning notification.
- If warm outside and no rain is expected in coming days and it didn’t rain much in previous days, start the water irrigations system for a while early in the morning.
- Turn on some color led lamp behind television when casting and making the led color randomly change when casting music.
- When a song is playing on ChromeCast or Nest Hub, allow with one click to retrieve artist and song name and query it for immediate mp3 download on YouTube-DL to store the music in our offline music Plex collection. With some iOS shortcuts, any song we hear (eg on radio) can be identified (eg with MusiXMatch / Shazam) and the song name and artist can be forwarded through Home Assistant (since remotely accessible) which will trigger the mp3 download using YouTube-DL. This way, the YouTube-DL site and API don’t need to be publicly/remotely accessible, so all queries are forwarded via Home Assistant with REST API.
- Monitor power consumption of fridge/freezer to get a warning if a long period is detected in which no power is used or very high power is used. I want to (try to) detect if the fridge has lost power or if the freezer door wouldn't be closed correctly (resulting in high power usage).
- Monitor power consumption of our home.
I have made a REST custom integration to fetch Pixometer.io values to be retrieved from thePixometer.io API.I made my own custom HACS integration to retrieve Pixometer.io scan details. - Track fuel prices from mazoutvoordeel.be and get notified if low prices are detected and/or fuel tank is getting empty.
- Track library loans and automatically extend loans when only couple of days are left, using my own custom HACS integration ‘Mijn Bibliotheek.be’
- Track Telenet internet subscription usage (telemeter), with my own custom HACS integration Telenet Telemeter.
- Track Youfone.be mobile phone and data subscription usage, with my own custom HACS integration Youfone.be.
- Check if traffic to work or home might be slower than expected and show a map of the traffic using the Waze travel time integration.
- 'Afvalbeheer' integration (installed via HACS) to get details of local waste collection. This allows to show specific warnings/notifications. If waste will be collected next day, but the garage door didn't open in last X hours or the phone is connected for charging in the evening, send special notification to highlight the waste collection. Example sensor configuration.yaml for Belgium (RecycleApp):
- sensor:
- - platform : afvalbeheerwastecollector: RecycleAppbuiltinicons: 1resources:- restafval- gft- papier- pmdpostcode: !secret postcodestreetnumber: !secret streetnumberstreetname: !secret streetnamecityname: !secret citynameprintwastetypes: 0upcomingsensor: 1dateformat: '%d-%m-%Y'name: Recycledutch: 1
Frontend web / app lovelace dashboards
I like to have all house automation easily accessible within the Home Assistant app using the interface (lovelace). Over time I’ve build different views and splitted these up as described below:
- General quick-switch screen with big buttons to easily control all devices, lights etc.
- Alarm screen with immediate view on main sensors and camera and allow to trigger alarm or cast camera to hub
- A separate screen is available to show photo and video album gallery with recent camera captures of motion detections
- A similar alarm main info screen is build, but with specific limited buttons specifically to cast to Nest Hub showing main info on small screen without need to scroll
- It can also show some graphs with recent alarm and sensor activities. Whenever I show graphs, I added a selector to easily define the history horizon to show. This is performed using a simple helper input_number variable that holds the number of hours of history to be loaded.
- Standard history graph lovelace entity config:
- Dynamic history graph, using custom lovelace integration ‘config-template-card’:
- Car overview showing state of car windows and locks and showing mileage and remaining gas.
- It can also show a map with car track in recent period and family members presence
- As the Audi connected services allows to get status of many different windows and locks, I added a bullet on the car picture to easily see which door/window/lock would be on. More or less similar integration is possible with other car vendors such as BMW etc.:
- Home central heating screen with clear overview of room temperature and humidity. This screen will allow me to quickly change temperature, hot water heating, control bathroom lights and ventilation, see upcoming weather conditions, etc.
- It can also show some graphs showing heating and temperature activity
- Again the ventilation is not smart, but by just connecting it to a wifi relay, some control to turn on and off is possible even with cheap devices.
- Media screen with overview of media playing and allow to quickly start YouTube, Spotify or plex media to stream to hub or ChromeCast devices. Also allows to control main devices by infra red to easily change volume, channel, etc. To integrate Spotify, I used the spotcast integration and developed a specific automation to detect if the Spotify playback is interrupted because it started to play on another device.
- Full floorplan image of all house levels showing all lights and plugs and electricity connections linked to the fuses within the electricity box: Every light or plug is linked to a fuse wiring which enables to quickly see the fuse linked to a specific light or plug. Whenever I’d need to turn off a fuse, I would immediately see which other plugs or lights would be impacted. Any fuse can be enabled/disabled to see which plugs/lights are linked, as well as any light or plug can be enabled/disabled to easily see to which fuse it’s linked.
- In order to allow easier configuration, I use many input helpers variables which are easier to change later on in order to tweak specific needs, instead of searching through all automations and scripts. With some templates this can be achieved, for example:
- Condition on sun elevation with input_number variables:
- {{state_attr('sun.sun', 'elevation') < states.input_number.sunset_elevation.state|float }}
- Conditions based on humidity sensor with input_number variables:
- {{states.sensor.room_humidity.state|float >= states.input_number.max_room_humidity.state|float}}
- If for example a delay is required, it can be based on a variable input_number:
- delay: '{{states.input_number.xxx_timeout_min.state| multiply(60) | int}}'
type: history-graph
entities:
- entity: sensor.speedtest_download
hours_to_show: 48
refresh_interval: 0
type: 'custom:config-template-card'
variables:
- 'states[''input_number.hours_of_history''].state'
entities:
- input_number.hours_of_history
card:
type: history-graph
entities:
- entity: sensor.speedtest_download
hours_to_show: '${vars[0]}'
refresh_interval: 0
The same approach can be used with any other lovelace entity card type to have a dynamic parameter, eg I use the same on a map card to hours_to_show on a map:
type: 'custom:config-template-card'
variables:
- 'states[''input_number.hours_of_history''].state'
entities:
- input_number.hours_of_history
card:
type: map
entities:
- entity: person.name
hours_to_show: '${vars[0]}'
default_zoom: 10
Integration with other applications
While setting up Home Assistant, the need rose to have an own multi media management platform, mainly for music, but also for some movies. So I added another docker container to run Plex and scan a folder with media files. Different plugins exist to integrate Plex with Home Assistant and the Plex Assistant looks promising, but is not yet setup (currently still missing full Dutch music support).
Below service is used to cast Plex to ChromeCast script in home assistant scripts.yaml, the input_select.media_player helper is used to allow a drop-down choice of the ChromeCast device to cast too. Within the helper variable input_select.PlexPlaylist all playlists defined in Plex are listed so you can choose which playlist should be started when casting, a random song will be selected from this playlist:
play_plex_media_selection:
alias: Play Plex media selection
sequence:
- service: media_player.play_media
data_template:
entity_id: media_player.{{ states('input_select.media_player') }}
media_content_id: 'plex://{ "playlist_name": "{{states(''input_select.PlexPlaylist'')}}",
"shuffle": "1" }'
media_content_type: PLAYLIST
mode: single
icon: mdi:play-network
To easily search a song on YouTube an cast it, I created a REST sensor based on YouTube API. Full details described in HA Community post.
In order to easily download much from YouTube, I also added a docker container MeTube with YouTube-DL yt_dlp including API. This was integrated with Home Assistant via REST API in order to easily allow to download any YouTube music video to mp3.
By setting the YTDL_OPTIONS updatetime to false, this will result in the same behavior as passing the command line option --no-mtime to yt_dlp. This will make sure the timestamp of the downloaded file will be set to current time of download (now). Else the local downloaded file will receive the timestamp of the youtube upload timestamp provided in the youtube headers.
docker-compose.yaml used for this YouTube-DLP MeTube:
metube:
# https://github.com/alexta69/metube
container_name: metube
image: "alexta69/metube"
restart: unless-stopped
network_mode: host
#ports:
# - '8081:8081'
volumes:
- /home/plex/media:/mp3
- /home/plex/movies:/video
environment:
- TZ=Europe/Brussels
- UID=1000
- GID=1000
- 'YTDL_OPTIONS={"updatetime": false}'
- DOWNLOAD_DIR=/video
- AUDIO_DOWNLOAD_DIR=/mp3
- OUTPUT_TEMPLATE=%(title)s.%(ext)s
Rest command integration to allow REST http request from Home Assistant towards YouTube-DL within home assistant configuration.yml:
rest_command:
youtubedl:
url: 'http://localhost:8081/add'
method: POST
payload: '{"format":"mp3", "quality":"best", "url":"{{ youtube_url }}"}'
content_type: 'application/json; charset=utf-8'
Script to call YouTube-DL via REST API:
download_youtube_mp3:
alias: Download YouTube MP3
sequence:
- service: rest_command.youtubedl
data:
youtube_url: '{{ states(''input_text.youtube_url'') }}'search_download_youtube_mp3:
alias: Search & Download YouTube MP3
sequence:
- service: rest_command.youtubedl
data_template:
youtube_url: ytsearch:{{ states('input_text.search_mp3_youtube') }}download_mp3_selection:
alias: Download MP3 selection based on selected media player playing artist and song
sequence:
- service: rest_command.youtubedl
data_template:
youtube_url: ytsearch:{{state_attr(('media_player.' ~ states("input_select.media_player")), "media_artist")}} {{state_attr(('media_player.' ~ states("input_select.media_player")), "media_title")}}
Once this is integrated, a webhook can also be defined within Home Assistant to allow a http call from other applications to pass through Home Assistant. Within Home Assistant automation.yaml. This allows for example to call your Home Assistant public dns with http query such as: https://homeassistant-public-dns/api/webhook/ytsearch?search=Faithless Insomina:
- id: 'XXXX'
alias: YouTube search and download webhook
description: ''
trigger:
- platform: webhook
webhook_id: ytsearch
condition: []
action:
- service: input_text.set_value
data:
value: '{{ trigger.query.search }}'
entity_id: input_text.search_mp3_youtube
- service: script.search_download_youtube_mp3
data: {}
mode: single
Having such a webhook, allowed me to define an iOS shortcut that would use Shazam and once the music has been identified, call the HA Webhook to immediately download the MP3 of the best YouTube video match. I have this iOS shortcut linked to a double or tripple tap on the back of my iPhone to very easily scan and download any song I hear without any further manual action.
- Shazam it
- Replace ‘&’ with ‘ ‘ in Shazam Media
- Get contents of url (webhook + shazam query input) with HTTP method POST
Further integration and optimizations with Plex have been shared in HA Community forum:
Apple Watch and CarPlay integration with Home Assistant
When using Apple Watch and CarPlay, iOS actions can be defined to easily trigger a Home Assistant automation and scripts.
Yet, iOS actions don't contain actual status information of your Home Assistant. In order to overcome this and further extend the action with related actions, actionable notification are very powerfull.
See information I wrote on this in the HA Forum and Apple Watch specific optimisations.
To make the Apple Watch very powerfull, I defined several action such as 'Alarm Status', 'Media Status', 'Light Status', 'Heating Status'. These actions will just trigger an actionable notification to be returned immediately. And these actionable notifications contain actual HA status information and the actions linked to it can be defined dynamically and with actual status information.
Update: 18/01/2024: Apple Watch and CarPlay information added.
Update: 09/01/2022 taking into account some last HA updates such as much improved Tuya support and Material Design icons.
Update: 21/02/2023: added info on Spotify and my own custom integrations
Update: 10/07/2023: updated info on MeTube instead of YoutubeDL container
Update: 13/12/2023: added extra blogpost links
Friday, January 21, 2011
Salling Clicker - Windows Mobile
Salling Clicker is a remote control software. It lets you control popular 
You can choose to have the computer take action when you make or receive a phone call or get close to your pc. For instance, Salling Clicker can automatically mute the system volume while you're on the phone or automatically lock the pc while your gone.
- Control PowerPoint, iTunes, Windows Media Player, and more with your mobile device.
- Works with all major Bluetooth stacks (no configuration required).
- Amazingly easy-to-use WiFi connectivity for long-range control.
- Works with over 300 devices.
- Easily extend support for other applications using JavaScript or VBScript
Scripts
Salling Clicker is installed with a set of default scripts (JavaScript for Windows) to support many different applications (PowerPoint, iTunes, MediaPlayer, etc.). On the forums of Salling Clicker many other custom scripts can be found, created and shared by the community.I've created a set of personal scripts, some are base on the official scripts, some are based on the scripts found in the forums and some are completely new. I just list all the scripts I use:
- De Slimste Mens: as explain in this separate blog post, I've created a complete interface to control the Flemish game "De Slimste Mens".
- myT Mouse Keyboard: full control for mouse and keyboard. Specially made for Windows Mobile devices with hardware keyboard (tested on Samsung Omnia B7310 and HTC Wizard (Qtek9100)). Use the screen to move mouse, use 'Menu' button to get context menu (mouse right click), use 'Help' button for extra options. To get a good overview of all options, I’ve put some screenshot online.
Use hardware keyboard to send all keys. The used keys will be displayed on the main screen for easy action tracking.
The extra option are:- switching of Shift/Ctrl/Alt/Win keys
- sending special characters
- sending function keys (eg F1-F12, pause, insert, delete, etc)
- sending media keys (play next song, webbrowser control, etc)
- sending long text: text input on device
- open a file on pc: navigate to folder and open a file, recent file history, easy access to favorite locations (eg start menu, 'my documents', etc)
- Zoom screen using freeware ZoomIt application, all ZoomIt options supported (pen, break, etc)
- Show a screenshot of the pc on the main screen.
- Exchange data from pc clipboard to device and/or put text into the pc clipboard
- PowerPoint: distribuated by Salling Clicker
- MediaPlayer: distribuated by Salling Clicker
- MediaPortal: from forum
- MediaCenter: from forum
- iTunes: distribuated by Salling Clicker
- BSPlayer: from forum
- VLC: from forum
- WinDVD: from forum
- MSN Online status: from forum
- uTorrent: from forum
- ShutdownControls: shutodown/hibernate/standby/screen on-off/lock
- Device Info: distiribuated by Salling Clicker
- Disconnect: distiribuated by Salling Clicker
- System volume: control pc volume
- MuteWhileOnPhone: distribuated by Salling Clicker
- CallNotifier: distribuated by Salling Clicker
- LockComputer: distribuated by Salling Clicker
- MonitorAway: distribuated by Salling Clicker
- Show Message: show message on pc
Monday, January 17, 2011
Toshiba Tecra S11
We recently replaced our old portable Lenovo ThinkPad T61 by the Toshiba Tecra S11, Intel® Core™ i5 M520, 2,40GHz, 4GB Ram.
Although this new one is certainly not the best device available, as can be read in this technical review, it has some nice new features like a finger print reader, SmartCard reader, webcam, DisplayPort and a larger HDD (320GB).
Drivers
When we received the laptop, not all drivers were installed correctly. Additional drivers can be download and should be installed in the provided order:
- TOSHIBA Assist
- TOSHIBA Extended Tiles for Windows Mobility Center, Windows Mobility Center can be opened in Windows 7 using the shortcut key Win+X
- Infineon Trusted Platform Module Software
- Intel Chipset SW Installation Utility
- Intel Management Engine Interface
- Active Management Technology (AMT)
- Display Driver, switch between displays in Windows 7 using the shortcut key Win+P
- Intel Storage Driver
- TOSHIBA Value Added Package
- Realtek Audio Driver
- NVIDIA HD Audio Driver 1.0.2.0
- LAN Driver Intel
- LAN Realtek
- ALPS Pointing Device Driver Touch Pad
- Ricoh Card Reader
- O2Micro Smart Card Reader Driver 1.1.4.207G
- TOSHIBA Software Modem
- TOSHIBA Software Modem Region Select Utility
- Wireless LAN Driver
- ConfigFree
- TOSHIBA Network Device ID Registry Setting Tool
- TOSHIBA 180 Degrees Rotation Utility
- TOSHIBA Fingerprint Utility
- TOSHIBA Face Recognition slows down Windows logon and not very effective
- Bluetooth Stack for Windows by Toshiba
- Bluetooth Monitor
- TOSHIBA eco Utility 1.1.12.64
- TOSHIBA HDD/SSD Alert 3.1.64.4
- TOSHIBA HDD Protection 2.2.0.3
- TOSHIBA Service Station V2.1.40
- TOSHIBA PC Health Monitor 1.5.1.64
- PlayReady PC Runtime
- TOSHIBA USB Sleep and Charge Utility 1.3.2.0 allows charging (power) external devices over USB, even while the pc is in sleep or hibernate mode
- TOSHIBA Web Camera Application V1.1.2.6
- BIOS Upgrade
- ReelTime
- Rapid Storage Technology Driver
- Registry Patch
- Security Assist
- Service Station
- TEMPRO
- Turbo Boost Technology
- Wireless Manager
Toshiba official software download site: http://aps2.toshiba-tro.de/, 64 bit drivers
Extras
- The build-in SmartCard reader can be used to read the Belgian eID cards, and thus also to login on the Tax-On-Web pages. After installation of the SmartCard driver (see above) and a reboot, install the eID software and reboot again.
- AutoSensitivity allows you to define different mouse sensitivities (speeds) for your touchpad and mouse and automatically switch between them (based on mouse connect / disconnect). This can be useful since the touchpad on this Toshiba is rather slow.
- Windows Explorer extentions
Update 22/05/2012: As I moved to Windows 64 bit, I added the link to download 64 bit drivers.
Wednesday, November 24, 2010
MoWes Portable + OS Commerce 2.2 / 3.0a

Full package download containing MoWes Portable 2, Apache2_SE, MySQL5_SE, PHP52, MediaWiki, OpenDB, OS_Commerce 2.2, OS_Commerce 3.0a, phpBB3 and PHPMyAdmin.

Monday, November 16, 2009
Recovery tools boot USB stick
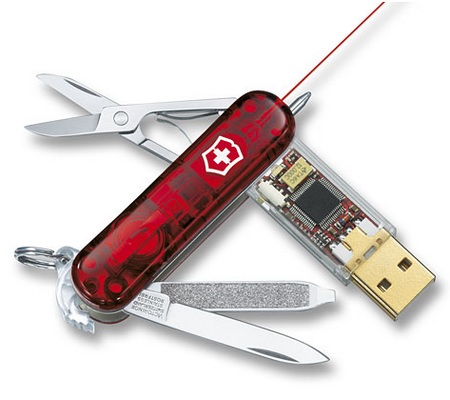
Based on Hiren's Boot CD 12 I created my personal Boot USB stick to be as complete as possible (containing more than 500 portable tools, 2,30GB). The original Hiren recovery CD contains many very useful tools to recover, tweak or patch pc's, divided into the following categories: Partition Tools, Backup Tools, Recovery Tools, Testing tools, RAM testing tools, Hard disk tools, System information tools, Master Boot Recovery tools, BIOS CMOS tools, Multimedia tools, Password tools, NTFS tools, Browser File manager tools, Other tools, Dos tools, Optimizers, Network tools, Process tools, Registry tools, Startup tools, Tweakers and Antivirus tools. A portable 'mini Windows XP' that can be run from the stick is available as well at boot time.
Many of the tools are available by booting up from the USB stick, but others need to be run into a Windows environment. These windows tools can be easily accessed by using the 'HBCDMenu.exe' tool which will be started when the cd or USB stick is started within a running Windows environment. Since the tools available within the 'HBCDMenu.exe' can be configured very easily using a 'HBCDMenu.csv' file, I created an Excel file to change the configuration an export to the csv file easier. Using this Excel it is much easier to move and rearrange the tools. Next I added all the tools I was still missing to make them available through the 'HBCDMenu.exe' tool. All tools are started using a DOS bat script and an UHARC archive. The archive is extracted in the PC's %temp% folder and started. All tools should be completely portable so no tool settings in the registry are kept after running them. I created a generic batch script to be able to run all tools in different modes: normal, just open a command window, just open an explorer windows, run the tool in Sandboxie, show online info on the tool, convert the tool into a zip file, force extraction of the uharc file. The mode is set by creating a specific file in the %temp% folder.
I keep all my personal files in a secured FreeOTFE file to make sure if I ever lose the stick no personal information can be discovered.
Besides the Hiren tools I also converted the latest BackTrack 4 bootable ISO to make it boot from a USB stick and added this into the Hiren boot screen menu. This live cd linux distribution is focused on penetration testing and perfect for quick and easy WEP cracking.
On the website of Hiren, a good explanation is provided by Hiren on how to easily convert the BootCD into a bootable USB stick using Grub4Dos. I used this 'menu.lst' as boot menu so it includes the launch of the BackTrack live environment and portable Mini Windows XP. Within an Windows environment, this 'autorun.inf' file is used to make it easier to start the 'autorun.exe' tool and other commonly used tools. To keep a backup of all my configuration, I configured a specific portable Dropbox so I can access all my tools online and keep them in sync on different locations.
The USB stick with all the extra tools requires now at least 2,29GB (I use it on a 8GB stick). I also added many of my extra tools into the CD iso file, but to keep it burnable onto a 80minute CD, some of the large tools didn't fit (office portable, tor browser, skype, toad, oracle client).
Compared to the original Hiren 10 boot cd, I've added different Windows tools. In the HBCDMenu cvs creator Excel, the complete list of all the tools are ordered in comprehensive categories. Many of these tools come from Sysinternals and Nirsoft since they provide some very useful portable little tools.
Update 25/11/2009: removed long list of personally added tools
Update 3/12/2010: update for Hiren Boot CD 12
Friday, October 16, 2009
Dropbox - daily usage
 Dropbox is a free online service to easily synchronize and backup your data. It can be very useful and it has some very nice features, but it has some limitations too.
Dropbox features:
- 2GB free online storage, easy registration.
- Easy sync to different computers / Macs.
- Files are always reachable using the Dropbox website.
- Dropbox keeps 30 days version and deleted files history.
- A public folder with direct static file url's makes it possible to host your site on Dropbox server.
- Sharing of folders between Dropbox accounts is possible.
Dropbox limitation:
- No filtering on files / folders is possible.
- For each account, one folder is synchronized. You need to use Junctions (hardlink NTFS shortcuts (easy Junction explorer extention)) if you want to include external folders in the sync.
- No default support for multiple account synchronization. You need to use the portable Dropbox (see information below) if you want to synchronize multiple accounts from the same computer at the same time.
- No option to make Dropbox always request for account password on startup (would be useful for the portable version).
Personal usage scenario's:
- Synchronization of my AI Roboform data so I have all my login's everywhere. I combine this with the Roboform2go on my USB stick and Dropbox portable to make sure everything is kept in sync.
- Hosting of files for websites. Instead of having to upload them to different free hosts with ads, I can now use the Dropbox space for easy hosting. Even complete websites are usable when hosted within the 'public' folder of a Dropbox account.
- Combination of FreeOTFE portable to make sure my USB stick portable Dropbox account is kept save. I place all Dropbox files within a FreeOTFE secured file, since else when losing USB stick, anyone could have access to my Dropbox account by just starting up the portable Dropbox application.
Some other tips and tricks for Dropbox usage from LifeHacker. The 'start torrent from anywhere' trick is nice!
- Since I use my personal SVN I wanted to make a combination of the automatic Dropbox synchronization coupled to the full control SVN synchronization for development projects. By using the Junctions I could link the SVN folders into Dropbox. Now I have an auto sync of files and folders, but I can manually sync with SVN to have an extra backup and history tracking with full control. The downside of this is that all hidden '.svn' folders are kept in sync too within Dropbox and this can take a lot of your Dropbox space. With the selective sync option in Dropbox, you can disable the syncronisation of the .svn folders to save space. But be carefull, when deselecting .svn folders in the Dropbox configuration, it will remove those folders from your local system. So it’s best to first create some dummy empty .svn folders, next disable the sync of these folders and then copy the real .svn folder at the correct location.
Dropbox Portable installation:
DropboxPortableAHK is now available. This makes the use of Dropbox Portable much easier. All download/configuration is now automated and very userfriendly. Just download from the developer website: http://nionsoftware.com/dbpahk/overview
Update 09/01/2011: New version of the Dropbox Portable framework (5.3.4). But this new framework requires a relink! The new version has easier update (just copy official Dropbox setup file in the update folder). Cleanup of blog and added extra info on installation.
Update 20/01/2011: added info from comments to change path in config.db
Update 03/04/2011: link to new DropboPortableAHK version, no more manual tweaks required.
Sunday, May 24, 2009
Cobol data + Cobol copybook + Java conversion
Although I'm absolutely not a fan of Cobol, it's still inevitable in the Finance IT development sector.
Lately, we needed a way to let Cobol and Java data work together, and we didn't want to hard code the complete data structure. To make this possible we noticed different non-free applications exist, but the open source project Cb2Xml got our attention.
This project already worked out some Java code to parse a Cobol copybook and convert it into an XML representation. (The copybook can be seen as the interface of the Cobol data). But this project was mend to import and export data from xml to Cobol stream and vice-versa, while we needed some Java objects to work with the received Cobol data input.
So I added some extra code to convert a Cobol data stream (String) into a Java object (using a Hashtable internally). Now, it's possible to provide a String of Cobol data and its interface definition (Cobol copybook file) and return a Java CobolElements object. One can search in this CobolElements object based on the name or xpath. I made a simple example to test, which might make it clear how to use the code.
A simple example of Cobol copybook used as data interface:
01 ACCOUNT-GROUP .02 ACCOUNT .03 DFND PIC 9(4) .03 DCTB .04 DUPD PIC 9(8) .04 DNUMCTB .05 DCTB-12 PIC 9(12) .05 DCTB-04 PIC 9(4) .05 DFMT PIC 9(2) .04 DCDRCTB .05 DRGOCDRCTB PIC 9(1) .05 DROFCMCCDRCTB PIC 9(3) .05 DBRACMCCDRCTB .06 DBRACMCCDRCTB PIC 9(6) .06 GBRACDRCTBREDEFINES DBRACMCCDRCTB .07 DROFCDRCTB PIC 9(3) .07 DBRACDRCTB PIC 9(3) .04 DBLK PIC 9(2)OCCURS 5 .04 DBLK2 PIC 9(3)OCCURS 5 .
The data that should match this copybook:
input = "00000000000039300022955600000123703602231122334455111222333444555"; Converting the data to a Java CobolElements object:
- Converting the copybook to an xml representation (this XML Document should be created once for each copybook and can be cached):
Document cb2doc = Cb2Xml.convert(new File(_cobolCopybookFileName), _debug); - Converting the Cobol data stream (input string) to it's matching Java representation:
CobolElements cobolElements = Dat2Java.convertWithDoc(input, cb2doc);
Retrieving data from the CobolElements object:
CobolElement childElement = cobolElements.retrieveChildElement("GOUTCTT-CSISEQ/GANSCTT-CSISEQ/GCTB/GNUMCTB/NCTB-12");System.out.println(childElement.getData());//returns: 393000229556childElement = cobolElements.retrieveChildElement("ACCOUNT-GROUP/ACCOUNT/DCTB/DBLK[3]");System.out.println(childElement.getData());//returns: 44
Download source and jar (zip 1,78MB) (link updated 16/09/2009)
Update (27/11/2009): After creating the cobol2java, we found another interesting open source project called LegStar. They have a completely worked out solution, while the code we use is quite basic and only usable with simple copy books...
Subscribe to:
Posts (Atom)


 Posts
Posts

